Home | Tutorial Index | Patterns


This is a tutorial for the Alice Paul and Septima Clark patterns, two unique hats from the Liberation Collection by Anne Kuo Lukito.
General
What do you recommend for yarn substitutions? What do I do if I want to substitute a superwash yarn?
This pattern was specifically written with a non-superwash yarn in mind (sample used The Fiber Company Canopy Fingering). If you are substituting yarn, make sure that you check gauge by working a swatch that you have washed and blocked, to assure proper sizing and fit.
For substitutions, I recommend a fingering weight yarn that is light, soft and with good drape. You’ll want that softer texture for the shirred panel. As far as color, I recommend a solid or a semi-solid. A yarn that is heavily variegated or color-contrasted would not work very well because I think it may look too busy and detract from the shirred panel.
It is easiest not to substitute with a superwash yarn. However if you do, swatching is even more imperative. Superwash yarns have a tendency to “grow” (usually more lengthwise) and can seriously interfere with and affect the fit of your hat.
Click here to download my guide on calculating and making adjustments for yarn substitutions. It’ll take you to a shopping cart, but don’t worry, this is a free download, unless you’d like to add a donation. 😉
What do you use for the stabilizer inside the bill for Alice Paul?
I try to recycle as much as possible and find things around the house. Here are some options:
- Heavier plastic – I use old plastic placemats or packaging materials. You can probably find some great ones at the thrift or dollar store.
- Ligthter plastic – Old beat up vinyl binders or recycled packaging materials are great for this. You can probably find some great ones at the thrift or dollar store too.
- Acetate sheets for stencils – people use these for home improvemen, scrapbooking and other crafts. You can probably find some at your local arts & crafts store, art supply store or home improvement center.
- Buckram – this is the stuff they use for draperies. You can find some at your local fabric store.
- Interfacing – this is the stuff that is used in clothes-making to add stiffness and structure to fabrics. They come in different weights. You’ll want to get heavy or super-heavy interfacing. They even have some that are a nice-bodied felt. You can find this at your local fabric store, though some (like Jo-Ann’s) may not carry the super heaving interfacing.
I’m finding it hard to do the band. Do you have any suggestions?
To be perfectly honest, this is my most hated part of the hat, but there really is no other way around it to give it that really nice finished look. I found that even working on 2 circulars or working a magic loop for such a small diameter was a pain, so I cut down some extra bamboo DPNs that I had into 3″ lengths and worked the band using 1 circular needle and 2 of my custom-size needles. Some stores stock 4″ DPNs that you can purchase.
Finishing Work: Seaming and Sewing
Why do you recommend steam blocking before seaming? Why not just wet block?
The steam blocking mainly just serves as a quick and easy way to uncurl the edges of each piece so that seaming is less fussy. You can certainly wet block as well if you prefer. I prefer steam blocking because it’s fast and I don’t have to wet block a second time when the hat is finished.
With either method, the point is just to remove the curling that naturally occurs with a Stockinette stitch fabric. Do NOT pull or stretch the pieces when you block. This is not at all like lace-blocking.
If you have not steam blocked before, pin the edges of the pieces to your towel or blocking board. Put your iron on “steam” and hold it about o.5″/ 1.5cm to 1″/ 2.5cm above the piece. Keep your fingers out of the way — the steam is very hot and can burn you.
If your iron does not have a steam setting, spray or mist your piece with water using a plant sprayer or the “spray’ function on your iron. Dial your iron to the hottest setting and hold it about o.5″/ 1.5cm to 1″/ 2.5cm above the piece for several seconds.
If you are using acrylic, nylon, polyester or other synthetic yarn, please be very careful. Do not touch your iron to the fabric or you may melt and burn it. For synthetic yarns, I recommend lowering the heat setting of your iron or holding it about 1″/ 2.5 to 2″/ 5cm above your piece.
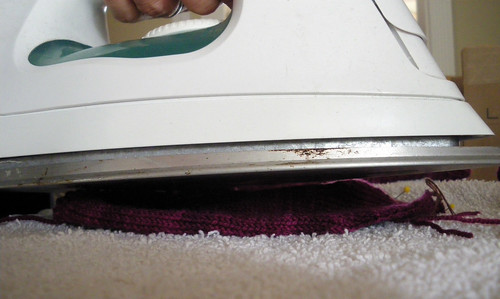
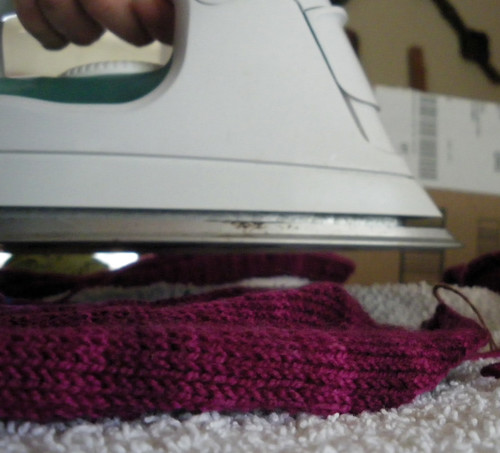
Above: Steam blocking the pieces before sewing. Do not place the iron your work. Instead, hold it above.
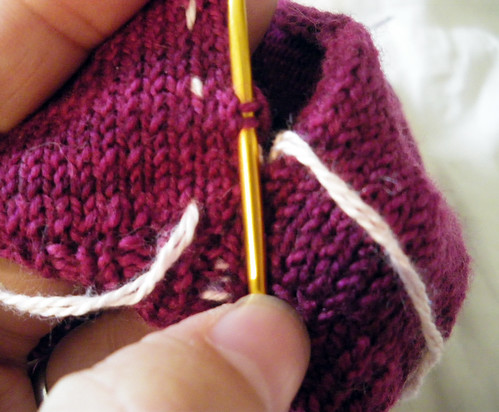
I’m not sure how to prepare the shirred panel. Where to I gather? And what do you mean by basting and pinning hte edges to make seaming easier?
Turn your shirred panel over to the WS. You will see a small channel along the vertical center created by the slipped stitches. Run a piece of yarn through that channel and gather the panel until it is the same height as the hat body. You’ll want to lightly tack it so that it doesn’t move. You may want to adjust the shirring later after the hat is completed so don’t tack it so much that you can’t readjust it.
(click on images to enlarge)

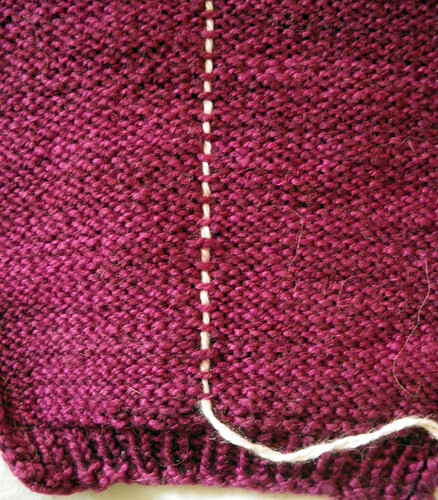
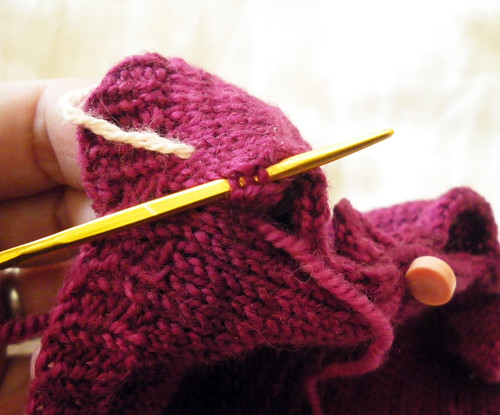
Left: The WS of the panel with the slip stitch channel in the center. Right: Channel with yarn running through it. Use your project yarn. A different colored yarn was used for demonstration purposes in this photo.


Above: Showing the pieces before and after the shirred panel is shirred/ gathered.

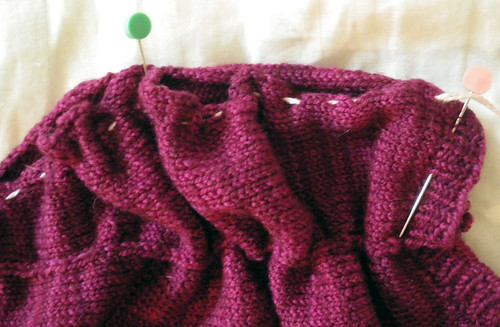
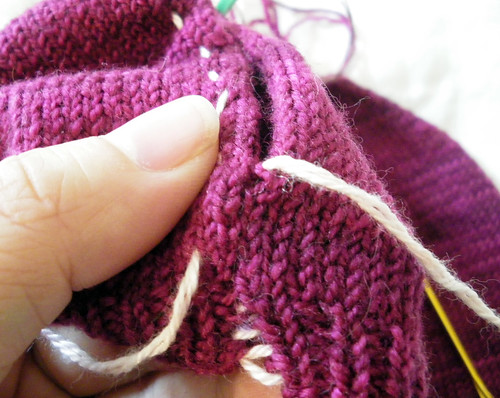
Left: Shirred panel pinned to body before seaming. Right: Shirred panel pinned to body before seaming but with a gathered basting waste yarn in it near the edge of the panel.
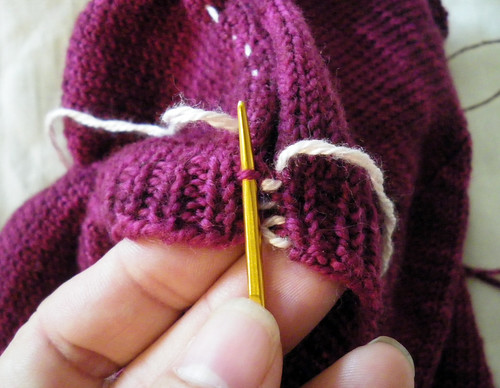
I’m not sure that I understand how do sew the panel to the hat body. Can you help?
When you sew the pieces, you are working a mattress stitch with the pieces at a ratio of about 2 rows of the panel to 1 row of the hat body. I actually like to vary this a little to give it a more organic flow. I mostly sew at a 2:1 ratio, but I switch it up sometimes and do a 3:1 or a 1:1.
You are going to work it like a regular mattress stitch, however in order to avoid any holes or gaps on the public side, make sure to pick up all the bars of the selvedge edge — don’t skip them. For example, if you are working a 2:1 ratio, don’t just pick up every other row of the selvedge edge of the panel to sew to the hat body. You’ll want to pick up 2 rows together. Likewise, if you do a 3:1 ratio, pick up 3 rows with your tapestry needle and sew it to 1 row of the hat body.
(click on photos to enlarge)
Left: Picking up 2 rows of the shirred panel to sew at 2:1 ratio; Right: Picking up 3 rows of the shirred panel to sel at a 3:1 ratio

Left: Now that 2 rows of the shirred panel have been picked up, sewing to 1 row of the hat body. All using mattress stitch technique; Right: Now the thread is pulled tight, showing the seam.
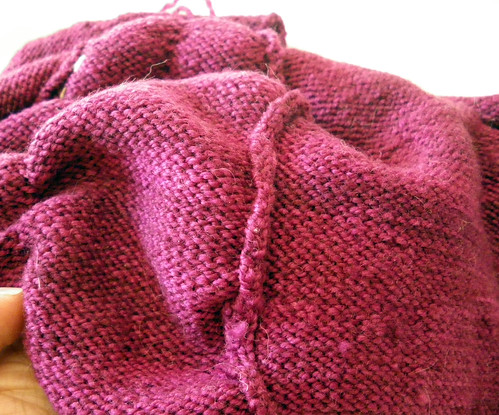
Left: What the finished seam looks like on the nonpublic side. The shirred panel is to the left of the seam. Right: The ribbing is sewn like a regular mattress stitch , with a 1:1 ratio.
How do I finish and seam the bill of this hat?
You will steam block and shirr the top part of the visor in the same manner as the shirred panel for the hat body. The only difference is that there is a slight curve to the visor piece. To seam the visor pieces, you will be seaming using the same technique shown above at a 2:1 ratio.

This FAQ is still under construction. If you have questions about the pattern, please feel free to post.
Check out some of my other patterns!


Speak!