Feeds:
Posts
Comments

Are you on my mailing list? If not, you should sign up! Don’t worry, I won’t inundate you with lots of emails. I usually send out 1-2 newsletters a month. Newsletter subscribers get updates on events and products, and occasionally, will get special coupons and discounts! So, what are you waiting for? Sign up now!

Also, please note that this blog has moved to a new home, to my new website! To find the blog in the future, please go here.

Knitalong With Me!

png;base64511254803f6f827b

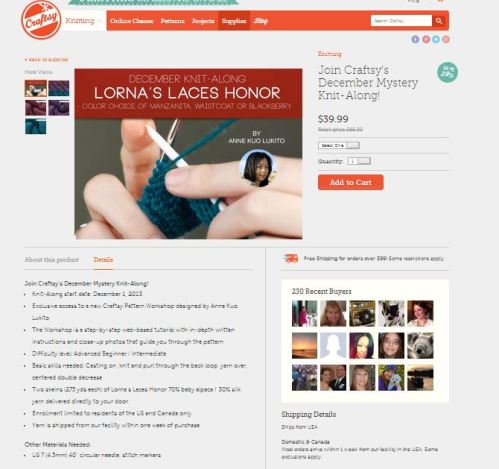
As of this writing, I am currently sitting in my hotel room after a long but fruitful weekend teaching at Stitches East. Throughout the weekend, several students and colleagues have mentioned that they saw a Craftsy promotion with me in it. What is it you ask? I am the designer/ instructor for Craftsy’s December Knit-along!! I was so excited when they asked me to design and lead the KAL and am even more excited that I can now let the cat of the bag! Here’s the link to the details for you to sign up.

KAL page snippet2

Because it’s a mystery knit-along (KAL), I can tell or show you exactly. However, I can give you some hints and teasers! The yarn I used is Lorna’s Laces Honor in color “manzanita.” Craftsy is offering the KAL  kit in 3 different color options: manzanita, blackberry and waistcoat. You can’t go wrong with any of the colors, because the folks over at Lorna’s Laces make beautiful yarns in beautiful colors.

Barton-Springs-AKL-logo-11b

The Craftsy Mystery Knitalong Workshop is a step-by-step web-based tutorial with in-depth written instructions and close-up photos that guide you through the pattern. Below are photos of my set-up for taking tutorial photos and an example of one of the tutorial photos.  The workshop will also have the a handy printed pattern you can print out and take with you on-the-go.

Untitled

crochetCO- step3 move yarn back- graphic

What you are seeing, my friends, are different variations of my new logo! I am so excited by these that I am sort of letting the cat of the bag a tad early.

AKL.Logo.Blue    AKL.Logo.Orange

I am moving towards a shift in my business and am rebranding all my patterns under my own name. I’ll still have Crafty Diversions, but it’ll go on a slightly different track. I can’t tell you everything just yet (soon), but all the changes are going to be quite exciting and for the better.

If you’ve been reading this blog and/or following me on Twitter or Facebook, you probably know that the Crafty Diversions site is undergoing some major construction changes. The http://www.craftydiversions.com site will have a new look some time in May, though it will likely continue to be a work in progress throughout the summer, as new features are tested and added.  Part of that change will also include a new website for my Anne Kuo Lukito designs and pattern line. The website is not up yet, but if you want to bookmark it to check it out in the near future (sometime in May), it’s http://www.annekuolukito.com.

AKL.Logo.Pink    AKL.Logo.Teal

So what does rebranding my patterns mean? It means that over the next 6 months, I will give all my patterns a makeover. All the content of my patterns will be the same, but they will just have a different look and layout.

AKL.Logo.Green    AKL.Logo.Yellow

By the way, the AKL logos were designed by talented Photographer/ Graphic Designer, Zoe Lonergan. She’s also the designer behind the Visionary Authors logo, the book designer for Hunter Hammersen’s Knitter’s Curiosity Cabinet series, photographer for Hunter’s KCC2 and the upcoming KCC3, and the book designer and photographer for Sandra McIver’s monumental book, Knit, Swirl.  My original Crafty Diversions logo, was designed by my talented medical illustrator/ artist/ nurse practitioner sister!

AKL.Logo.Black    CD logo - ORIGINAL - oval

**For up to the minute updates and news, follow me @AnneKuoLukito on Twitter and CraftyDiversions on Instagram or “Like” my Crafty Diversions page on Facebook!**

“Sublimity” from The Book of Cowls. Photo courtesy of Sivia Harding.

I met Sivia Harding in person for the first time at Sock Summit 2011. First of all, I was a very pleasantly surprised (ok, a little giddy) when she said she knew of me, but even more pleasantly surprised that she was so nice. As I’ve gotten to know her as a friend and fellow Visionary Author, my opinion of her has not changed. She is that nice. And talented.

This talented lady has a new ebook, The Book of Cowls. It’s currently available as a subscription purchase. It’s a collection of seven cowls for all seasons with matching cuffs, which she will update over the course of four seasons. They all feature her unique and beautiful aesthetic and of course, I’m sure you’ll surely see her signature with lace and beads in the designs. The debut design for this collection is Sublimity, a shaped cowl reminiscent of medieval days, utilizing a fetching assortment of simple techniques and stitches: ribbing, cables, twisted stitches, lace, and beads.

“Sublimity” from The Book of Cowls. Photo courtesy of Sivia Harding.

I can’t wait to see the rest of the designs for The Book of Cowls!

**For up to the minute updates and news, follow me @AnneKuoLukito on Twitter and CraftyDiversions on Instagram or “Like” my Crafty Diversions page on Facebook!**

Craftcation Recap

A message from Craftcation that I think we all should strive to be everyday. Photo: courtesy of Matthew William Photography.

At the end of March, I was privileged to be able to attend and present a workshop at Craftcation to various talented crafters on publishing patterns, tutorials and ebooks and using them as additional income streams.  I had a packed room in my workshop and it was so inspiring and interesting to meet all sorts of artists, food crafters, jewelry-makers, quilters, sewers, knitters and other creatives. Organizers Nicole and Delilah really exceeded my expectations in creating a very fun and unique conference for creatives…nothing like those career-type and other such conferences I’m sure many of you have all attended. Every element of the conference exuded creativity and sought to foster creative thought for the crafty indie businessperson. You just really have to be there to see and feel it, but if you weren’t there, I can share some photos with you:

The Craftcation pop-up shop. Do you see the awesome 😉 gift tags? Photo: courtesy of Matthew William Photography.

The awesome bar at the BBQ. Photo: courtesy of Matthew William Photography.

Tons of people at the opening night reception and BBQ. The was great food, an fun and awesome bar, and DIY craft stations! Photo: courtesy of Matthew William Photography.

Hey, it’s me teaching! Photo: courtesy of Matthew William Photography.

Unfortunately, I had to go home early and work (boo) and I missed the 80s party on Saturday. Susan (L) and Lauren (R) of Creative Outlet Studios seem to be having a blast (and they did all the props) with Craftcation organizer. Photo: courtesy of Matthew William Photography.

Seriously folks, you should try to attend Craftcation in 2014 if you can. It’s fun and inspiring. I enjoyed the opportunity to meet and network with other creatives outside of my knitting world genre. I also was able to hang and chat with friends Megan from  Creative Bug, Lauren and Susan from Creative Outlet Studios (fabulous multi-crafting space in Costa Mesa!) and Alicia DiRago of Whimsey Box. I also met several new friends, including a few knitters and Carol Cho, marketing/business development specialist at Kollabora!

Please note that the first 6 photos are courtesy of Matthew William Photography. You can see his work and more Craftcation photos on his site. The rest of the photos are mine.

My kind of BBQ: fun bar, DIY stations, crafty people #craftcation #makers2013 #diy #indiebiz #handmade

From the Thursday night BBQ. I painted the bangle at one of the DIY craft stations.

This is how I'm spending my lunch hour to refocus and gather for my 1pm presentation #craftcation #makers2013 #californiasunshine #knitting

I took a quite breather before teaching my workshop by enjoying the beachside venue. This is why I love California.

We made our own @craftcation knitting group! @caroleatsagain from @kollabora, Lauren from @creativeoutletstudios / @outlettings and @ninaevezeininger #craftcation #makers2013 #knitting #knit #yarn

And of course, I made up and found my own little knitting group while at Craftcation!

**For up to the minute updates and news, follow me @AnneKuoLukito on Twitter and CraftyDiversions on Instagram or “Like” my Crafty Diversions page on Facebook!**

This year, I will be participating in the Los Angeles Yarn Crawl again. This year, Stitch Cafe over in Valley Village (Studio City) area is hosting my trunk show. (Those of you who remember the show Knitty Gritty, might have seen Stitch Cafe on TV!) On Saturday, 4/13, I will also be teaching “Kitchener Like A Pro” and “The Right Fit.” I offered both of those classes at Stitches West and they sold out  (in fact, all of my classes) at my cap of 25 students per class. So, please jump on this opportunity and share with your friends. There is still space in both of these classes. To sign up, call Stitch Cafe at (818) 980-1234. Descriptions of the classes below:

The Right Fit

The Right Fit - class handout

Snapshot of the handouts for “The Right Fit” class.

In “The Right Fit,” we will discuss different body types, evaluate your body type and shape, how to measure your body, how to adjust for problem areas, what knitting patterns to select for your body, how to make modifications and adjustments to your knitting to best highlight your assets and hide those problem areas, and much, much more! This is definitely a hands-on exploratory class for everyone. If this class is taught at a yarn shop, we will also talk about color selection and go around the shop to look at yarns.

Kitchener Like A Pro

Kitchener Like A Pro!

Comparison of the mattress stitch (right), regular Kitchener (center) and Kitchenering in pattern (left).

In this class, we will learn how to graft in pattern. We will talk about stitch theory to help you understand why your needle will go one way and not another, the mechanics of the Kitchener stitch,  the mechanics of Kitchenering in pattern and situations in which this technique can be useful. I also have developed an easier method for you to read grafting instructions and will teach you how to use this method to make it easier for you to graft in pattern. We will practice grafting different kinds of stitches, including Stockinette, reverse stockinette, seed stitch, different rib stitches and cabled stitches.

**For up to the minute updates and news, follow me @AnneKuoLukito on Twitter and CraftyDiversions on Instagram or “Like” my Crafty Diversions page on Facebook!**

As usual, Stitches West this year was great fun. I always enjoy the excitement of the show, the camaraderie of knitters, my wonderful students and friends. And I really have to say that the XRX/ Stitches staff does an excellent job putting together a show of such mass proportions! I taught 3 classes: Kitchener Like A Pro (grafting in pattern off the needles), The Right Fit (your body shape and finding/adapting knitting patterns appropriate for it) and DIY (Design it Yourself): Shawls and Stoles (tons of shawl shapes and how to achieve it). Kitchener Like a Pro and DIY Shawls & Stoles were sold out very early on in registration and I had only 3-4 spots left in The Right Fit, but by the time all the classes started, all my classes were sold out (I capped all classes at 25 students). THANK YOU STUDENTS!

"Kitchener like a pro" class at Stitches West

Students from my “Kitchener Like A Pro” class working hard and showing off their successfully grafted ribbing and cable swatches in pattern.

Mera, Revisited

Cal was in my “The Right Fit” class. She is showing off the “Mera, Revisited” pattern she made after taking a class on that pattern the year before at Stitches.

Stitches West 2013; Flame pattern

“Flame” is a crescent-shaped shawlette worked in a really cool reversible edging pattern and it was on display at the Windy Valley Muskox booth, where they sold out of about 50 patterns of Flame within the 1st hour of the 2nd market day!

Stitches West 2013

Anzula had “Fantome Hat” and “Fantome Cowl” both on display and selling as a kit with their Sebastian (merino/seacell) yarn. They also sold some soft launch test products of my gift tags.

Stitches West 2013

And my friends at Bijou Basin Ranch, had the “Mera Shrug” on display in their booth. That was one of my favorite projects because the yarn was Bijou Bliss, a yak/cormo blend.

Some of the other fun things from Stitches included running into Christina and Debbie from Alamitos Bay Yarn Co. on my flight, meeting 3 generations of knitters during the Student Banquet, petting all the pretty yarns, button-shopping, hanging out with my friends, old and new, and just being able to be part of it all. Oh and let’s not forget my first encounter with an Inu-knit (aka Lily Chin in costume)!

Stitches West 2013 Stitches West 2013 Lily Chin as an Inu-knitStitches West 2013

A note regarding my website

Folks, I also want to let you know that my website is going through a major facelift and some construction woes. You can still navigate and purchase from it, but I cannot list new stuff on it. So, for the time being, you will see a new tab at the top of this blog, “~~PATTERN & PRODUCT INFORMATION~~” That’s where I’m putting and listing all my new stuff. Thanks!!

**For up to the minute updates and news, follow me @AnneKuoLukito on Twitter and CraftyDiversions on Instagram or “Like” my Crafty Diversions page on Facebook!**

Homemade almond butter is the best. All store-bought ones I've had now just taste subpar in comparison. #diy #homemade
Every time I post photos about my homemade almond butter, I get questions from friends interested in trying it for themselves. You ask and you shall receive!

Almond butter is very easy to make and delicious! I made some over the holidays to give as gifts and saved a few jars for myself. I ate all the almond butter and got a little too busy to make more, so I went to both Mother’s and Trader Joes and bought some good almond butter. Yuck. Okay, not to say that they are low quality butters. They are excellent…unless you’ve made your own, then there’s no going back. The beauty of making my own almond butter is that I can get it they way I WANT it…extra roasted and extra crunchy.

The following recipe can be adapted to your own tastes and preferences. The measurements I give are estimates based on my own preferences and taste. I also use organic ingredients whenever possible.

Ingredients

4-5 cups of raw whole almonds

1/4 tsp sea salt

1 tbsp extra virgin olive oil, avocado oil, or your preferred oil

1-2 tsp brown sugar or honey

Tools

food processor

spatula

storage jars or containers

Instructions

1. Place almonds on a cookie sheet and roast in your oven at 250 degrees Farenheit for 30-60 minutes, stirring at least 2-3 times during baking to prevent burnt nuts. I like my nuts really toasty so I bake them for a while. After removing from the oven, let the nuts cool for at least 30 minutes.

2. Toss the almonds in your food processor with the “S” blade. Process the almonds until you get small chunks. Remove approximately 3/4 cup of the chopped nuts and set aside. Be careful not to cut yourself with the sharp blade when removing the nuts.

3. Add salt and sugar. Process the remaining nuts until they get really thick and sticky. At this time, it may appear that the food processor won’t go anymore, but don’t worry, it will. Just scrap the bowl and move the butter around a few times with a spatula. Add oil.

Homemade almond butter in the making! Smells so good. #yummy

4. Continue processing until desired consistency. I don’t like my butters creamy, so I process until the nuts are almost grainy, somewhere in between the size of granulated and turbinado sugars. Add the chopped nuts you set aside earlier. Process for a few more minutes until blended.

5. Scoop out the butter and store them in your storage containers. You can keep them in the refrigerator or in your freezer if for some odd reason you don’t go through your almond butter as fast as me. 😉 How many containers you get depends on the size of them and how much you eat while you make your almond butter.

Substitutions: You can substitute other nuts like peanuts, cashews and walnuts. For those nuts, I would omit the oil because they are oilier nuts. Also, I find that the roasting time for those nuts are shorter than almonds.

Enjoy!!

Running a mini almond butter factory in my kitchen! Canning lots of jars!

If you are making some almond butter as gifts for friends, why not add a special touch with these awesome gift tags?

Handmade love

A note regarding my website

Folks, I also want to let you know that my website is going through a major facelift and some construction woes. You can still navigate and purchase from it, but I cannot list new stuff on it. So, for the time being, you will see a new tab at the top of this blog, “~~PATTERN & PRODUCT INFORMATION~~” That’s where I’m putting and listing all my new stuff. Thanks!!

**For up to the minute updates and news, follow me @AnneKuoLukito on Twitter and CraftyDiversions on Instagram or “Like” my Crafty Diversions page on Facebook!**